Showing posts with label yum. Show all posts

Thursday, January 28, 2016

What We Ate

I love seeing what other people eat and getting ideas for our menu because I can get stuck in the same meals over and over!
I thought I would start sharing about we have eaten over the past week. I will link to recipes where I can!

I do have to make modifications to our meals since I am dairy free. I will substitute dairy free "butter" for regular butter and almond milk (I use unsweetened original) for regular milk. I also divide certain recipes and then add cheese to the portion for Tim and the kids. 
It really hasn't been a big deal and I'm obviously feeling better by not consuming dairy which makes it all worth it!
I do have to be vigilant about reading labels because milk can be in so many things!

Here's what we ate since last Friday:

Bourbon Chicken, fried rice, sauteed green beans, and egg rolls.
This is a family favorite!
 The best meatloaf, instant mashed potatoes, and green peas. 
We can't be gourmet alllll the time. 
This was the first time making this specific meatloaf and we all loved it!
We had purple hull peas with ham (that was in the freezer saved from Christmas) on Sunday but I didn't get a picture of that meal.

 Chicken spaghetti makeover, sauteed green beans, sliced strawberries with a *little* sugar sprinkled on them.
I haven't made chicken spaghetti in a long time because the recipe I have uses "cream of" soups and I can't have any of that since I am dairy free. This turned out really good!
This is a picture of my plate. I separated the food out before I added cheese to the part for Tim and the kids. 
We actually ate this two nights in a row and had salad with it the second time.
I know this isn't a great picture. It was taken quickly after we had already eaten dinner, so it was what was left over. 
This was a recipe that I created- It is an Italian Gnocchi bake.
First, I browned up a pound of Italian sausage. Next, I placed chopped frozen broccoli florets (about half of a package), the sausage, and a package of potato gnocchi (my kids call them dumplings!) in my new Dutch oven. (side note- I got this Dutch oven in November and I have used it several times since. I love it!)
To all of that, I added a can of spaghetti sauce and about 1 cup of chicken broth to thin that out.
I baked it in the oven at 350 degrees for about 40 minutes.
It was so good and gobbled up by everyone!
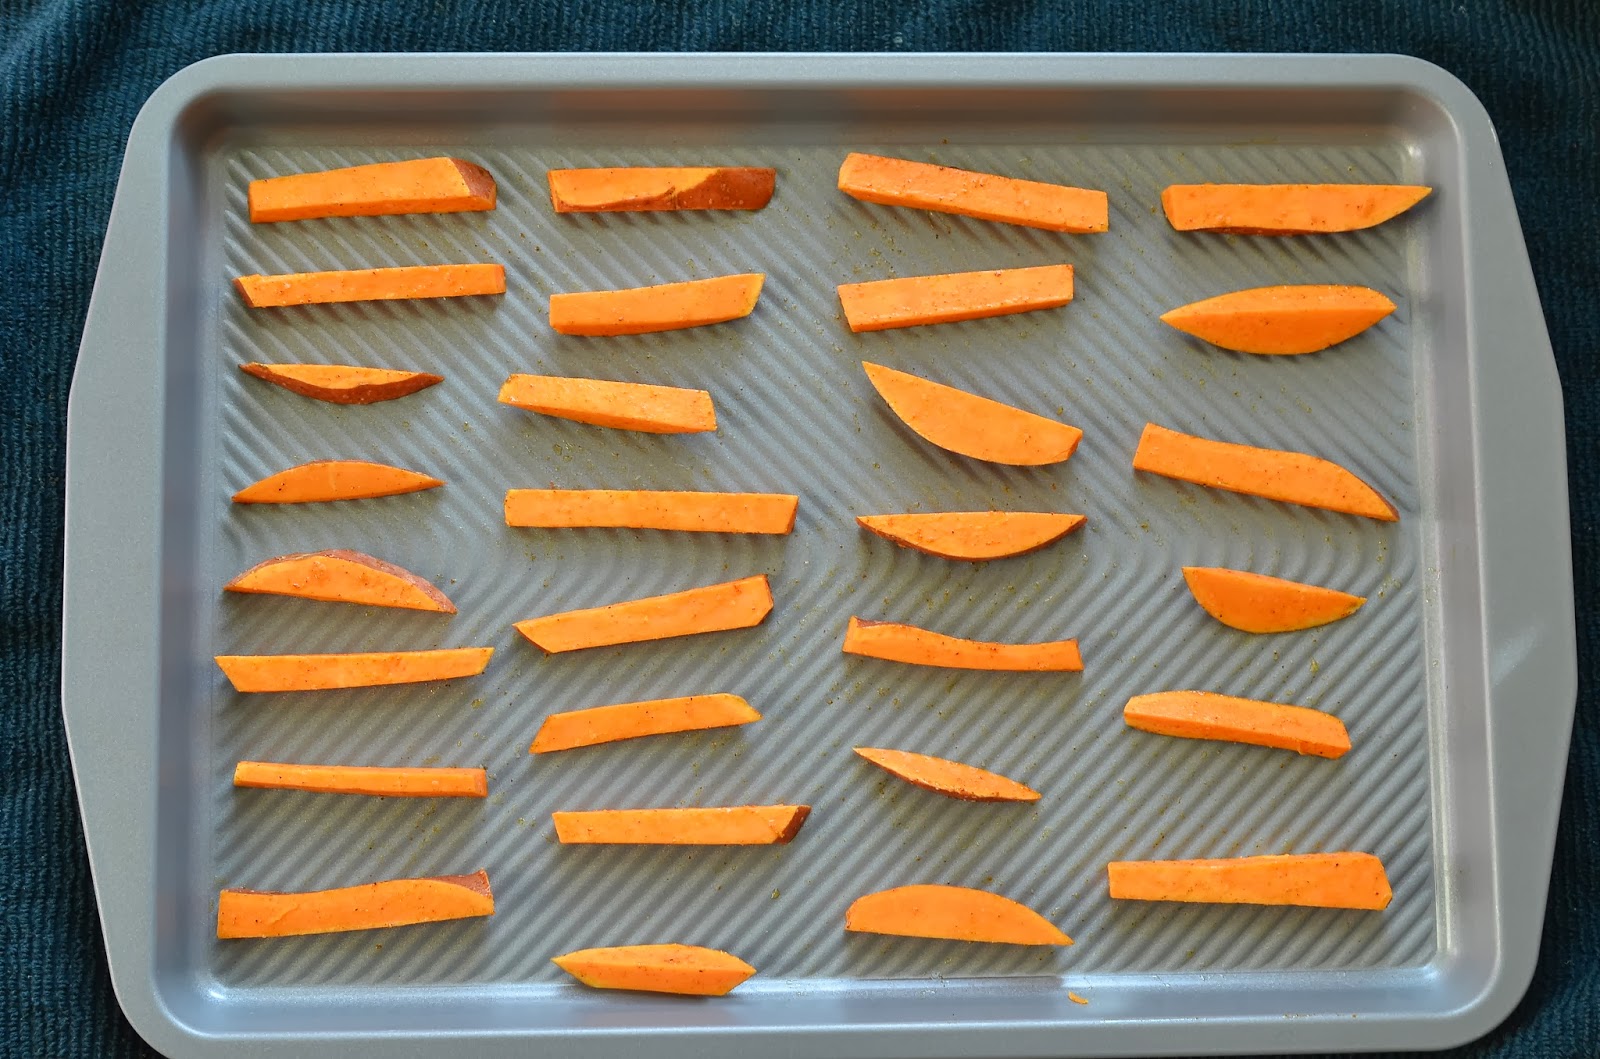
Pan seared wild caught flounder, roasted russet and sweet potatoes, and salad.
A couple of other food related things:
  • I bought my first ever fresh mango this week. I watched a YouTube video to learn how to cut it! I learned that I really love fresh mango!
  • My kids used to beg to "be a tray" at school. I am big on packing their lunches, but over the last year and not feeling well, my kids have eaten at school a lot more than normal. Needless to say, they don't ask to be trays anymore. They've expressed how lunch at school really isn't that good. I find that so sad because lunch was usually pretty good when I was growing up. Do you remember the rolls and cinnamon rolls??!!!

Tuesday, November 11, 2014

cranberry pound cake

This is one of my favorite cakes ever. The sweet and tart mixture is perfect.
With the holidays approaching, cranberries will be inexpensive, as will most other baking supplies. 
Don't be alarmed if you eat half this cake in one setting! Just kidding! 
But really, it is hard to resist!
Cranberry Pound Cake
3 eggs
2 cups sugar
3/4 cup butter
1 teaspoon vanilla extract
1 teaspoon almond extract
1 teaspoon salt
2 tablespoons milk
2 cups flour
1 bag cranberries
Cream butter and sugar. Add eggs, extracts, salt and milk and beat to combine. Add flour, 1/2 cup at a time. Once well combined, add cranberries. If you’re using a stand mixer, you’ll hear some of them pop but that is okay! Scoop batter into well-greased and floured Bundt pan, making sure not to scrape the sides and remove the flour. Bake in a pre-heated oven at 350 for around 40 minutes or until a cake tester comes out clean. 

Thursday, September 11, 2014

The yummiest Oatmeal Raisin Cookies

I'm not sure why I have never posted our recipe for oatmeal raisin cookies. This is very high up on my favorite cookies list. Tim and the kids cannot get enough of them either. Also- I like to think they are a little healthy since they have oats and raisins. Just let me keep thinking that :-)

The Yummiest Oatmeal Raisin Cookies

1 cup shortening
1 3/4 cup all-purpose flour
1 tsp baking soda
1/2 tsp. salt
1/2 tsp. cinnamon
1 1/4 cup packed brown sugar
1/2 cup granulated sugar
2 eggs
2 tsp. vanilla
2 cups uncooked oats
1 cup raisins (sometimes I use golden raisins)

In a large mixing bowl, beat shortening, on med-high speed for 30 seconds.  In a smaller bowl, stir together 1 cup of the flour, baking soda, salt and cinnamon. Add this to the shortening along with brown sugar, sugar, eggs and vanilla.  Blend 1-2 minutes or until thoroughly combined. Stir in remaining flour and oats. Fold in raisins. Drop by rounded teaspoons 2 inches apart onto an ungreased cookie sheet. Bake at 350° for 10-12 minutes or until edges are lightly browned. Cool on wire rack.

Monday, June 9, 2014

Chicken Enchilada ring

I just finished updating the recipes tab at the top of the blog. Somehow, a few recipes had not been added to it!
This recipe is from Pampered Chef and is a big favorite at our house.
If you have never tried this before, you must rectify that soon!

This picture only has a cross section of the "ring." I failed to get a picture of the entire ring before it was eaten!

2 cups coarsely chopped cooked chicken
1/4 cup chopped pitted ripe olives
1 (4 ounce) cup shredded cheddar cheese, and monterey jack cheese blend
1 (4 ounce) can chopped green chilies, undrained
1/2 cup mayonnaise
1 tablespoon taco seasoning
2 plum tomatoes
1 lime
2/3 cup finely crushed corn tortilla chips, divided
2 (8 ounce) packages refrigerated crescent dinner rolls
1 cup salsa
1 cup sour cream

Preheat oven to 375F. Chop chicken and olives using Food Chopper; place in mixing bowl.
Add cheese, green chilies, mayonnaise, and seasoning mix. Seed and chop 1 tomato.
Slice lime in half. Using Juicer, juice one half of lime to measure 1 teaspoon juice.
Reserve remaining lime for garnish. Add chopped tomato and lime juice to chicken mixture. Reserve 2 tablespoons crushed chips; add remaining chips to chicken mixture and mix well. Sprinkle reserved crushed chips over cutting board.
Unroll crescent dough. Place dough, sticky-side down, onto crushed chips; press down lightly, so chips adhere to dough. Separate dough into triangles. Arrange triangles, chip side down, in a circle on round baking stone (or round pizza baking sheet) with wide ends overlapping in the center and points towards outside. (There should be a 5-inch diameter opening in center.) Scoop chicken mixture evenly onto the wide ends of each triangle.
Bring points of triangles up over filling and tuck under wide ends of dough at center of ring.
(Filling will not be completely covered.) Bake 20-25 minutes or until golden. For garnish, cut remaining tomato into 8 wedges. Cut remaining half of lime into 4 slices; cut in half.
Arrange between openings of ring. Cut and serve with salsa and sour cream.

Thursday, May 22, 2014

Broccoli salad

This recipe is not mine and it is not new, but it is very good. I have made it quite a few times in the past few months. It makes me eat more raw broccoli and there ain't anything wrong with that!
Broccoli Salad
2 heads fresh broccoli
1/2 pound bacon
3/4 cup raisins
3/4 cup sliced almonds/pecans
1 cup mayonnaise
1/2 cup white sugar
2 tablespoons white  vinegar
DIRECTIONS:

1.
Place bacon in a deep skillet and cook over medium high heat until evenly brown. Cool and crumble.
2.
Cut the broccoli into bite-size pieces. Combine with the bacon, raisins, your favorite nuts and mix well.
To prepare the dressing, mix the mayonnaise, sugar and vinegar together until smooth. Stir into the salad, let chill and serve.

Wednesday, April 2, 2014

sweet potato fries


I started making sweet potato fries a few years ago. We really love them, but they always ended up being soggy. I happened to see somewhere that the fries cannot be touching while cooking or they will end up soggy. Bingo! Now, we separate them and no more soggy fries!

First things first. I cut up one large sweet potato into fries. I then toss the fries in a bowl with olive oil, salt and pepper. Next, I place them on the baking sheet with room to breathe! Bake at 450 degrees for about 10 minutes, flip and then bake for 10 minutes more. You can cook them longer if you want them extra crispy :-) They do get darker as you bake them, but it is carmelization, not burnt-ness! Try them, you might like them!

Saturday, March 1, 2014

Fish Tacos

Food is an important part of our family. 
We love to cook and we love to eat. 

When I was growing up, my parents cooked at home a lot, but they were not very adventurous in the kitchen. 
I studied food preparation in college and that was the first place where my eyes were opened to the joy of cooking and different kinds of food.
Tim opened my eyes to even more food experiences and we love to try new foods and recipes.

I have been creating a recipe book with all of our family recipes.
I have posted some of them on the blog and you can find them here.

Since I have had children and gotten older, healthy food has become more important to me.
Being diagnosed with IBS has also contributed to eating changes in my life.
I've learned that a lot of times, healthy food tastes better and makes you feel better than the alternatives.

In our day and age, there are many more food options than ever before.
However, knowing what is a "good" choice isn't always cut and dry.
I've read and researched and I try my best to make the healthiest choices that are within our budget.
We make good choices the best that we can, but we also enjoy treats.

A few years into our marriage, I decided that we should eat fish pretty frequently.
For the longest time it consisted of pan fried tilapia or salmon.
We have added a few more dishes since then. One of those dishes is fish tacos.
I had never eaten a fish taco until last year.
I had always been leery of them for some reason. Once I tried them, I was hooked and determined to make them at home.

We tried a few different versions before we arrived at this recipe.
There are so many ways to do fish tacos. The fish can be grilled, baked, or fried. The toppings and sauce are all up to your imagination.
Our version is just what we like. You can look around at recipes on the web and create your own fish tacos!
Fish Tacos

-4 tilapia fillets
-1/2 cup Panko bread crumbs
-butter to coat pan for pan frying the fish
-1 cup prepared black beans
-Sauce:
1/3 cup sour cream
1/3 cup mayonnaise
1 tsp. taco seasoning
juice of 1 lime
-Pico de Gallo
1 medium tomato, chopped
1/2 medium onion, chopped
3 sprigs fresh cilantro, finely chopped
1/2 tsp. garlic powder
salt and pepper to taste
-hard or soft shell corn tortillas

Melt butter in pan over medium to medium high heat. Coat tilapia fillets in panko crumbs and place in pan. Cook on both sides until fish flakes easily with a fork.
To prepare sauce, combine sour cream, mayonnaise, taco seasoning and lime juice. To prepare pico de gallo, combine tomato, onion, cilantro, garlic powder, salt and pepper. 
Assembling tacos: in taco shell, add fish, black beans, pico de gallo and top with sauce.

Monday, January 20, 2014

Chocolate Chip Cookies

Today seems like a good day to have cookies, am I right?!
One of my close friends gave me this recipe years ago and it is the only one I have made since. 
Tim absolutely loves this recipe and the cookies are usually gone in two days.

Chocolate Chip Cookies

2 1/4 cup flour
1 tsp baking soda
3/4 tsp salt
1/2 cup butter
1/2 cup shortening
1 cup packed brown sugar
1/2 cup granulated sugar
2 eggs
1 tsp vanilla
1 pkg semi-sweet chocolate chips


Preheat oven to 350°. In small bowl, stir together flour, baking soda and salt; set aside. In large mixing bowl, beat butter, shortening, and sugars until creamy. Beat in eggs and vanilla.  Add flour mixture; mix well. Stir in chocolate chips. Bake 10-12 minutes.

Wednesday, December 4, 2013

Seriously good Taco Soup

Our weather is about to get really cold and nasty.  There is nothing I like better on days like that than a hot bowl of soup.  This soup is one that we make frequently.  The kids lap it up.  That's a win in my book!

Taco Soup

1 lb ground beef
1 can pinto beans, rinsed
1 can black beans, rinsed
1 can mild Rotel
1/2 pkg frozen corn (or as much or little as you like!)
1 pkg Hidden Valley dry ranch dressing mix
taco seasoning to your liking (I make my own seasoning so I pour as much in as I think looks good. If using a package, maybe 1 package?)

Combine all ingredients in slow cooker or stock pot and cook on low for 3-4 hours.  We love to sprinkle cheese over this in our bowls and serve with corn chips! Yummo!

Tuesday, November 26, 2013

Crock-pot Thanksgiving dressing & a visit to Santa {Recipe}

We had breakfast at The Egg and I in Rogers this morning with Tim after his doctors appointment.  We had been wanting to try it for a long time.  It was really good!
Afterwards, we headed over to the Promenade to visit Santa!
I know, I know. It is still November.
BUT, we were the only ones there and the kids had a blast visiting with Santa!
Compiling all of our recipes digitally and also putting them into a binder has been a big goal of mine for awhile.  I haven't had lots of time to work on it, but it is at the top of my list right now.
I want to have all of our recipes together for my sake and for the kids to have someday.

Today, we are having our own family (Tim, the kids, and I) Thanksgiving.
We are having turkey, dressing, cranberry sauce, sweet potato casserole, asparagus and pie!

This dressing recipe is from my mom.  She made it a few years ago and it was instantly my favorite dressing ever.
It has so much flavor and is so moist! I cannot tolerate dry dressing!
Crockpot Thanksgiving dressing  (or make it anytime you want!)

8-inch pan of prepared cornbread
8 slices of bread
4 eggs
4 cups chicken broth
2 cans cream of chicken soup
1/2 cup chopped celery
1 medium onion, chopped
1 tsp salt
1 tbsp sage
1/2 tsp pepper
2 tbsp butter

Crumble breads, then add all ingredients except butter. Pour into crock-pot and dot butter on top.  Cook on high for 2 hours or on low for 3-4 hours.

Monday, November 25, 2013

Pumpkin pie {Recipe}

I pretty much love every season.  By the time they get here, I'm so ready for the change.

However, from the end of November to the end of December may be my favorite time of the year.

I love the holidays. We are in full gear for Thanksgiving and have even started a little for Christmas :-)
I love the traditions.  Today, the kiddos painted ornaments like they do every year. 
Most importantly, I love the FOOD!

We have four Thanksgiving meals over the next three days and today I began baking.  This morning, I whipped up pumpkin pies, pecan pies, and sweet potato casserole.  Tim says my pecan pie is the best. Ever.  I have to say that it is very, very good.  
Pecan pie is my most favorite pie.  

Another pie is high up on the list too-- pumpkin pie.
Pumpkin Pie

1 can pure pumpkin
1 can evaporated milk
2 eggs, slightly beaten
3/4 cup brown sugar
1 tsp flour
1/2 tsp salt
1/2 tsp cinnamon
1/4 tsp ginger
1/4 tsp nutmeg
1/8 tsp cloves
2 9-inch unbaked pie shells/crusts

Preheat oven to 425 degrees. Thoroughly blend all ingredients and pour into pie crusts. Bake for 15 minutes, then reduce temperature to 350 degrees and bake 40-50 minutes or until knife inserted near center comes out clean.  Cool on a wire rack for 2 hours. Serve immediately or refrigerate.

Thursday, August 29, 2013

The best cinnamon rolls I've ever had [Recipe]

I have been dying to learn how to make homemade cinnamon rolls.

The best cinnamon rolls I ever remember having, were on beef stew day in the cafeteria at school when I was growing up. 
I've never found a cinnamon roll that has really came close to them.
I tried making the Pioneer Woman's recipe last year. I don't know what happened, 
but it was a total flop :(

I gave up for awhile after that.
Then, in Sunday school someone had made homemade cinnamon rolls and it gave the itch to try again.

I did an Internet search for the best cinnamon rolls ever and I came across THIS 
(Recipe and my notes below.)
I have to admit, when I saw the potato in the recipe, I was pretty skeptical.

Another problem I've always had is getting my dough to rise.
It would rise, but it would never double.

I don't know what the magic in these cinnamon rolls comes from, but they may actually be better than the ones I remember.
This recipe is not hard, but it is somewhat time consuming.
However, a lot of the time is waiting on the dough to rise.
And rise, it did!

If you've ever wanted to learn to make cinnamon rolls, I highly suggest this recipe!
They are perfect in my book!
Yield: 12 servings
Time: 3½ to 4 hours, mostly unattended
*My notes are in purple
1 small potato (about 4 ounces), cut into 1-inch chunks
1½ teaspoons salt
4½ cups flour, plus more for kneading and shaping
1 cup sugar
2¼ teaspoons instant yeast or one ¼-ounce packet active dry yeast
¾ cup (1½ sticks) butter, at room temperature
1 large egg
Oil or butter for greasing the bowl and pan
1 tablespoon ground cinnamon
2 cups powdered sugar
3 tablespoons whole milk
1 teaspoon vanilla extract (I used 1/2 tsp vanilla and 1/2 tsp maple extract)
1. Put the potato in a medium saucepan with ½ teaspoon salt and enough water to cover it by at least 1 inch. Cover the saucepan, bring to a boil, and cook until the potato is very tender, about 15 minutes. Meanwhile, combine the flour, ½ cup of the sugar, the yeast, and the remaining 1 teaspoon salt in a large bowl.
2. Drain the potato, reserving 1¼ cups of the potato-cooking liquid, and put the potato through a ricer (I just used a fork and smooshed it. You are just trying to get baby food consistency.) (Discard the potato skin.) Add ¼ cup (½ stick) of the butter to the reserved potato-cooking liquid and stir until it melts. When the butter mixture cools to 100°F—about the same temperature as the inside of your wrist(I used my candy thermometer and did the exact temp it called for)—add it to the flour mixture along with the riced potato and the egg. Stir with the dough-hook attachment of a stand mixer or by hand until combined.
3. Knead the dough with the dough-hook attachment of a stand mixer or by hand until it feels smooth and elastic, about 10 minutes, adding flour as necessary to keep the dough from sticking. Grease a large bowl (it’s fine to use the same one you mixed the dough in), add the dough, and turn it over to coat it lightly with oil or butter. Cover the bowl with a clean kitchen towel or plastic wrap, put it in a warm place, and let the dough rise until doubled in size, about 1 hour. (I set my bowl outside because it is very hot and humid. Maybe that was the difference in why I got the dough to rise so much?)
4. Grease a 9- by 13-inch pan(I used two 8-inch round pans) with oil or butter. Punch down the dough, then transfer it to a floured surface. With a rolling pin, roll the dough into an approximately 8- by 12-inch rectangle(I did this exactly and the dough was still 1/2 inch to 3/4 inch. So it will look kinda puffy, not flat.) Spread the remaining ½ cup (1 stick) butter over the surface of the dough(My butter was softened, not melted.) Combine the remaining ½ cup sugar with the cinnamon and sprinkle this mixture evenly over the butter. Starting from one of the long sides, roll up the dough as tightly as possible. Cut the roll into 12 one-inch slices and arrange the slices, cut side up, in the greased pan.
5. Cover the pan with a clean kitchen towel or plastic wrap, put it in a warm place, and let the rolls rise until doubled in size, about 1 hour.(Again, I put mine outside to rise.) (At this point you can refrigerate the cinnamon rolls for up to 12 hours or overnight; let them return to room temperature before baking.)
6. Heat the oven to 350°F. Uncover the cinnamon rolls and bake until golden brown, 35 to 40 minutes. Meanwhile, whisk together the powdered sugar and milk until smooth, then whisk in the vanilla(and maple extract.) Let the cinnamon rolls cool slightly, then drizzle the icing over them and serve warm.

Tuesday, March 26, 2013

Homemade Chicken and Dumplings


When I take a meal to a family, it is almost always chicken pot pie or chicken and dumplings.  This is definitely an "old-fashioned, takes some time" recipe.  But it's so good that I don't mind taking the time to make it.  This makes a pretty full pot and we rarely have much left over.

Chicken and Dumplings 

Broth- 
2.5-3 lb whole chicken, or 4 cups cooked chicken, chopped or shredded
2 cups chicken broth, or 6 cups chicken broth with water added as needed
water 
Dumplings- 
2 cups all-purpose flour 
1/2 tsp salt 
5 T butter 
1 egg 
1/2 cup whole milk 

Place the chicken into a large pot. Add chicken broth and water. Make sure the chicken is covered with water. Bring to a boil and reduce heat to simmering. Throughout cooking, skim away any foam that forms in your pot. Simmer for 1 1/2 hours until chicken is done and tender. Remove chicken from the broth and allow to cool. De-bone the chicken once it is cool enough to handle. While de-boning the chicken, discard the undesirable parts. Cut de-boned chicken into bite sized pieces. OR Bring pre-made broth/water to a simmer and then skip to nest step.

To prepare dumplings, mix flour, salt, egg, butter, and milk in a stand mixer. Continue to mix until a ball forms. Form your dumplings by rolling out the dough to about 1/8 inch on a cutting board. Use a sharp knife or pizza cutter to cut your dough into bite-sized pieces.

Bring the chicken broth to a boil. Drop dumplings into the broth, ensuring that they submerge. Add all of your dumplings to the broth. Reduce heat to medium-low and cook for 8-10 minutes. Add chicken and simmer until chicken is heated. You can also thicken broth with a cornstarch/water paste to your liking.


Chicken and dumplings do not photograph very pretty, but I added the picture anyway.  

Wednesday, January 9, 2013

Vegetable Beef soup

We made this yum, yum, yummy soup over Christmas break and you should make it too!
Vegetable Beef Soup
  • 1 (14 ounce) can chicken broth
  • 1 ground beef, browned and drained
  • 1 (11.5 ounce) can tomato-vegetable juice cocktail
  • 1 cup water
  • 1 large potato, diced
  • 2 carrots, sliced
  • 2 stalks celery, diced
  • 1 (14.5 ounce) can diced tomatoes
  • 1 cup chopped fresh green beans
  • 1 cup fresh corn kernels
  • 1 cup uncooked small pasta
  • salt and pepper to taste

In a large stock pot, combine beef, broth, tomato juice, water, potatoes, carrots, celery, undrained chopped tomatoes, green beans, and corn. Season with salt, and pepper. Bring to a boil and simmer for 30 minutes or until all vegetables are tender. Add pasta and cook until pasta is al dente.

Tuesday, July 31, 2012

Homemade Chicken Pot Pie

This recipe was shared with us from a lady Tim used to work with, Janet Eubanks.  I'm not sure if this is "her" recipe or one she had found somewhere.
Either way, it is out of this world. 
It takes a lot of time to make, so maybe this is a weekend dish for you, but man is it worth it!
chicken stock
veggies
I LOVE my pastry blender- I use it for doughs and pie crusts all the time!
 Mmmmmm, crust!
Chicken Pot Pie

1 cup chopped onion
1 cup chopped celery
1 cup chopped carrot
1/3 cup butter
1/2 cup all-purpose flour
2 cups chicken broth
1 cup half & half
1 tsp salt
1/4 tsp pepper
4 cups chopped, cooked
chicken
*basic pastry

Sauté onion, celery and carrot in butter
for 10 minutes. Add flour to sautéed mixture, stirring well; cook 1 minute, stirring constantly.
Combine broth and half & half; gradually stir into vegetable mixture.  Cook over medium heat, stirring constantly, until thickened and bubbly.  Stir in salt and pepper. Add chopped chicken, stirring well.
Pour chicken mixture into a greased shallow 2-quart casserole dish. Top with pastry; cut slits to allow steam to escape.  Bake at 400° for 40 minutes or until crust is golden brown.

*Basic Pastry
1 cup all-purpose flour
1/2 tsp salt
1/3 cup plus 1 T shortening
2-3 T cold water
Combine flour and salt in bowl; cut in shortening with pastry blender until mixture resembles coarse meal. Sprinkle cold water evenly over surface; stir with a fork until all dry ingredients are moistened. Shape into a ball; chill. Roll pastry to fit casserole dish. Yield: enough pastry for 9-inch pie

Thursday, July 26, 2012

Chocolate Gravy Goodness

My husband and I were talking about chocolate gravy one night last week, and he said that he was surprised how many people he had come across that had not even heard of chocolate gravy.  I also found that odd because I had been raised eating it!  


I wanted to know if it was an Arkansas thing or a Southern thing or what! The writers at Delish.com believe it is an Arkansas thing.  I did some asking around, and it seems that it is indeed a Southern thing, and maybe even an Arkansas thing.  However, it really depends on if your family ate it or not.  Not all families do and therefore, a lot of people have not heard of it.  


So, I guess that means that we are a "chocolate gravy family!"  However, even most chocolate gravy families only eat it maybe four times a year.  This is why most people who are not chocolate gravy families have probably not heard of it.


Homemade gravies really are not that difficult once you have learned the basic technique.  Gravies basically consist of a fat/oil, liquid, and a thickening agent.  In this recipe, we use butter for the fat, milk for the liquid, and flour is our thickening agent.  The cocoa and sugar are added to make the distinct flavor for chocolate gravy.
||||||||||||||||||||||||||||||||||||||||||||||||||||||||||||||||||||||
Chocolate Gravy
{this is my mom's recipe and I don't know where it originated before that! It's the one I use!}

Sift dry ingredients together:
3 T flour
3 T cocoa
1/2 cup sugar

2 cups cold milk
1/2 stick butter

  • Heat milk and butter in a medium saucepan over medium low heat and bring to a boil. {This is a slow process, you do not want the milk to scald!  I slowly increase the heat closer to the medium mark as it heats up
  • Slowly add dry ingredients to pan, WHISKING constantly.  By using a whisk, it helps to break up the dry ingredients so that the gravy is less lumpy. 
  • Continue stirring/whisking until mixture is completely blended and begins to thicken. I usually keep the heat closer to medium during this process.  You do not want the gravy to be really thick. It will thicken as it cools. 
  • Remove from heat.  
  • Serve over biscuits.  {p.s. I use canned biscuits!}